

STEP 1 - Log Into DiaryBook
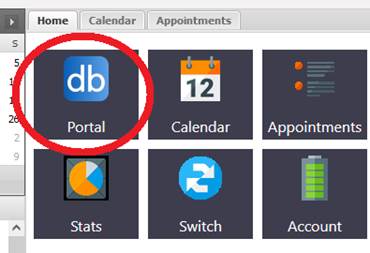
Log into your DiaryBook account and click on the Portal icon:
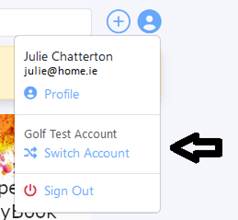
If you have several DiaryBook accounts, make sure to access the correct one. Click on the blue person icon, top right-hand side of your screen:

If the correct account is displayed continue to STEP 2, otherwise click on Switch Account and select the account you require
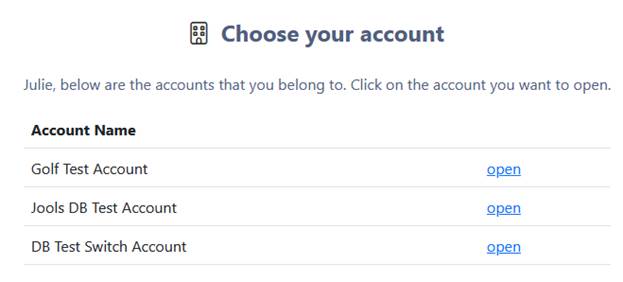
If you have multiple accounts you will see a screen similar to this:
STEP 2 - Access the Reminder Profile Settings
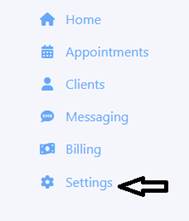
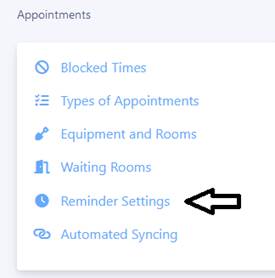
Click on Settings on the left-hand side of the screen:
Looking down the list of sections in the middle of the screen, find the Appointments section and select Reminder Settings:
You should see something similar to the following screenshot, which displays a template Reminder Profile along with any Reminder Profiles already created. At this point you can edit the existing Reminder Profiles:
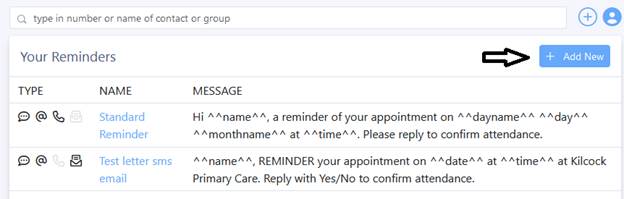
STEP 3 - Create a New Profile
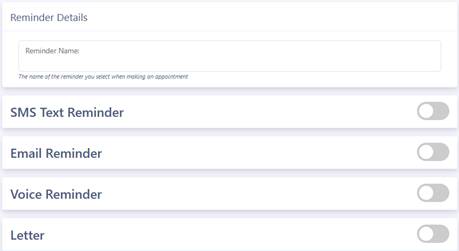
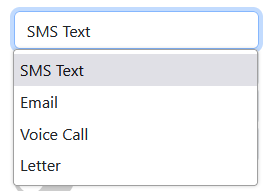
Click on Add New to create a new Reminder Profile and give your new profile a name. Then select your type of Reminder Profile(s) by sliding the greyed-out bar to the right until it goes blue:
SMS Text Reminder
The Enables Replies: option is set to On as a default. If you don’t require the client’s reply adding to their DiaryBook appointment entry, slide the Blue bar to the left until it goes grey.
Similarly, the Main Number Only: option is set to off. By switching this option on, only the main number in a client record will be sent the message. If your client is a minor or has a carer they may need messages sent to both two contacts, in which case leave this as greyed-out.
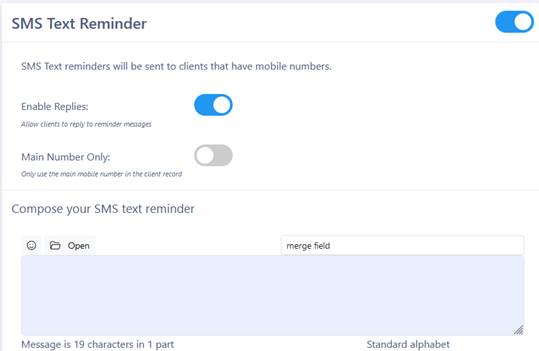
In the Compose Your SMS Text Reminder box, add your message including any merge fields:
i.e. “Hi ^^name^^ your outpatient appointment is on ^^date^^ at ^^time^^ in our New Surgery. Please respond Yes if you can attend or No if you are unable to. To re-schedule or for further information contact us on 01 234 5678”
Skip to Step 4 - Scheduling Reminders
Email Reminder
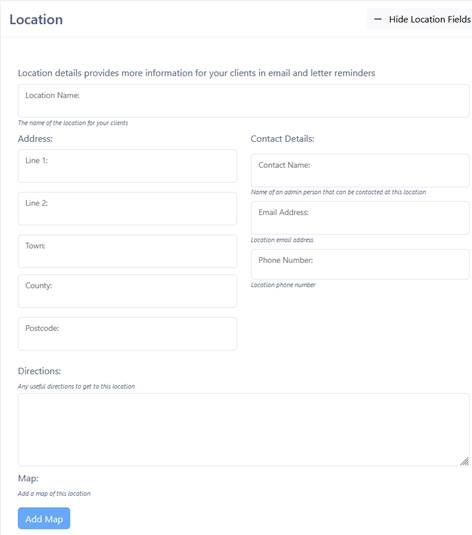
Once activated, the appointment details will be emailed to the email address within the client record. Any information added into the Location section will be included in the email.

Skip to Step 4 - Scheduling Reminders
Voice Reminder
When the Allow client to confirm: option is selected, the message received will enable the client to confirm their attendance. Their response is fed into DiaryBook and marked against their appointment.
Similarly, when the Allow client to cancel: option is selected, the client will be able to cancel their appointment
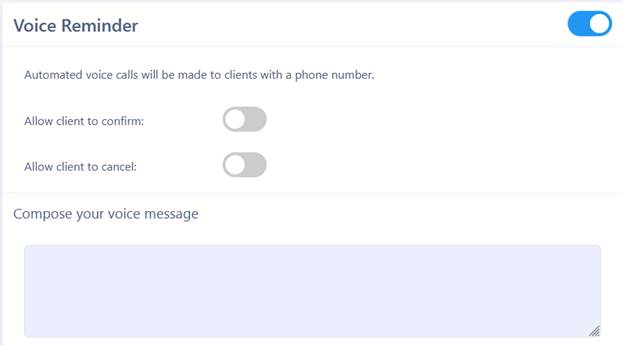
Example message
Hi ^^name^^, a reminder of your appointment on ^^dayname^^ ^^day^^ ^^monthname^^ at ^^time^^. Please confirm your attendance. Call 012345678 to re-schedule.
Once the above message has been relayed they will be given the option to press 1 to confirm or press 3 to cancel their appointment, depending upon the settings.
Skip to Step 4 - Scheduling Reminders
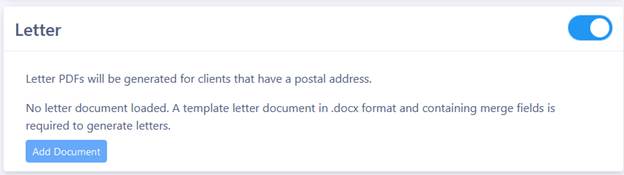
Letter Reminder
Include valid merge fields for the letter to be populated with information relating to the appointment. Logos can be added or spaces left to print onto headed paper.
STEP 4 - Scheduling Reminders
This schedule is used for all types of reminder SMS/Email/Voice Call/Letter. The schedule is how DiaryBook knows which reminder to send and when.
Once you’ve finished composing your messages, letters etc., scroll down to the Schedule Item section and click on Add New:
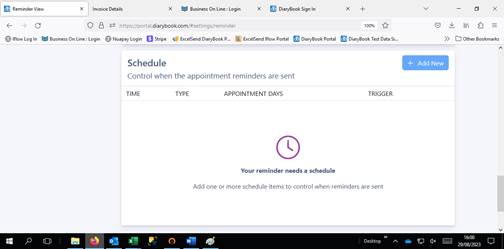
The following dialogue box opens:

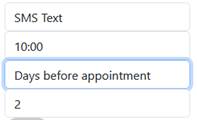
Under Reminder Type: select whether this is an SMS Text, Email, Voice Call or Letter:
The Earliest Time: defaults to 10:00. To avoid clients receiving messages in the middle of the night, Reminders can only be scheduled between 06:00 19:45. Occasionally an operator who is unable to deliver a message will re-try several times and this may go into the night.
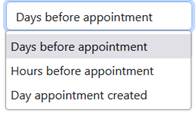
The Trigger: is what prompts DiaryBook to act on the reminder settings. It can be a number of Days before appointment, Hours before appointment or the Day appointment created.
The default for Hours is 3:
The Include Confirmed Appointments: option is greyed out but if you want a final reminder to be sent to clients who have confirmed their appointments, move the greyed out button to the right until it turns blue.
The default settings For appointments on the following days: is that all days of the week are enabled. Individual days may be disabled by moving the blue button to the left until it goes grey.
The Use Custom Text Message: enables you to create a second SMS Text message that differs from the original message created at the beginning of the SMS Text Reminder Profile.