Diarybook Getting Started Tutorial
Introduction
Welcome to the Diarybook Getting Started Tutorial. This guide is designed for users who are joining an existing Diarybook account. It provides a quick walkthrough of accessing and using the service.
Note: This tutorial assumes your account has already been set up by an administrator. Setup steps are not covered.
What You’ll Learn
- Using the welcome email to access Diarybook.
- Adding and editing clients and appointments.
- Cancelling appointments and texting notifications to clients.
Accessing Your Account
Step 1: Validate Your Profile
- When added to a Diarybook account, you’ll receive an email with a link titled “Validate User Profile”.
- Click the link to open your browser.
- Set your password by entering it twice and clicking “Set Password”.
- Once you see the “Activated” screen, you’re ready to sign in.
Step 2: Sign In
- Open your browser and go to: portal.diarybook.com.
- Enter your email address and password on the sign-in screen.
- Click “Sign In”.
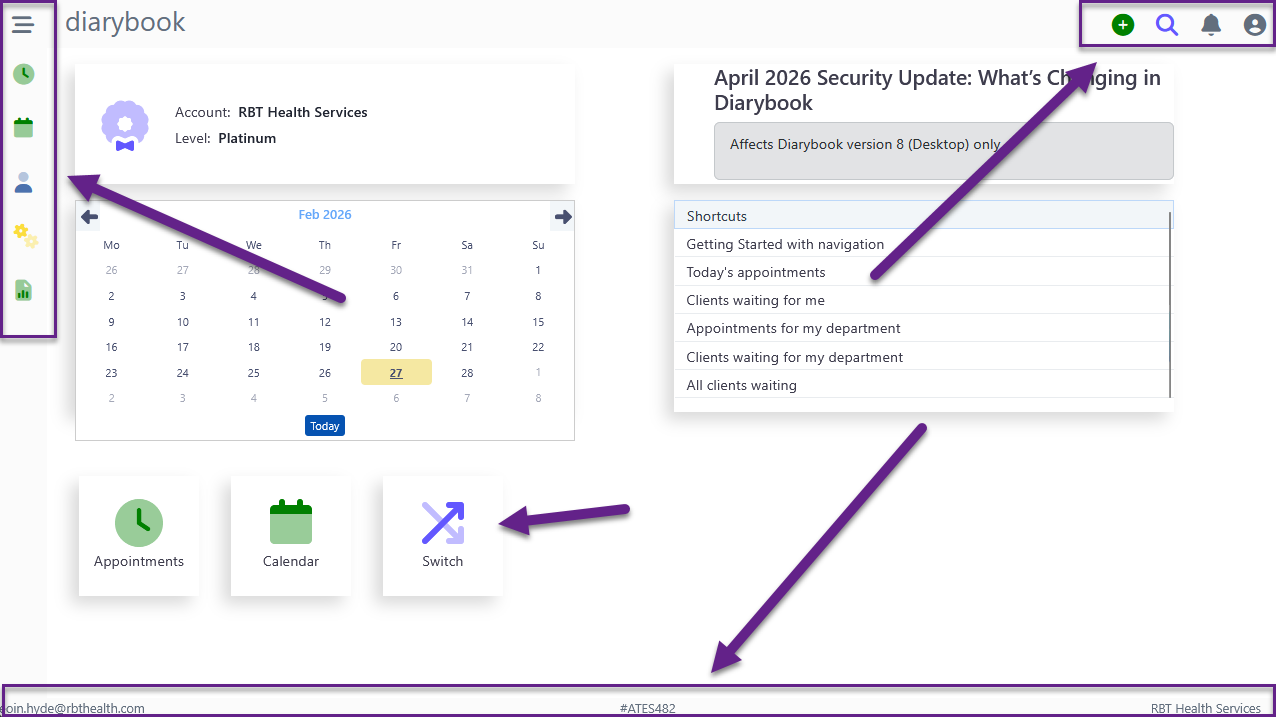
Navigating the Home Page
- Left Margin: Icons for different areas of Diarybook (Area Menu).
- Top Right: Action buttons and menus.
- Bottom: Your user ID and the name of the account(s) you’re signed into.
- Use the “Switch” button to switch between accounts if you belong to multiple.
Adding Clients
Step 1: Gather Required Information
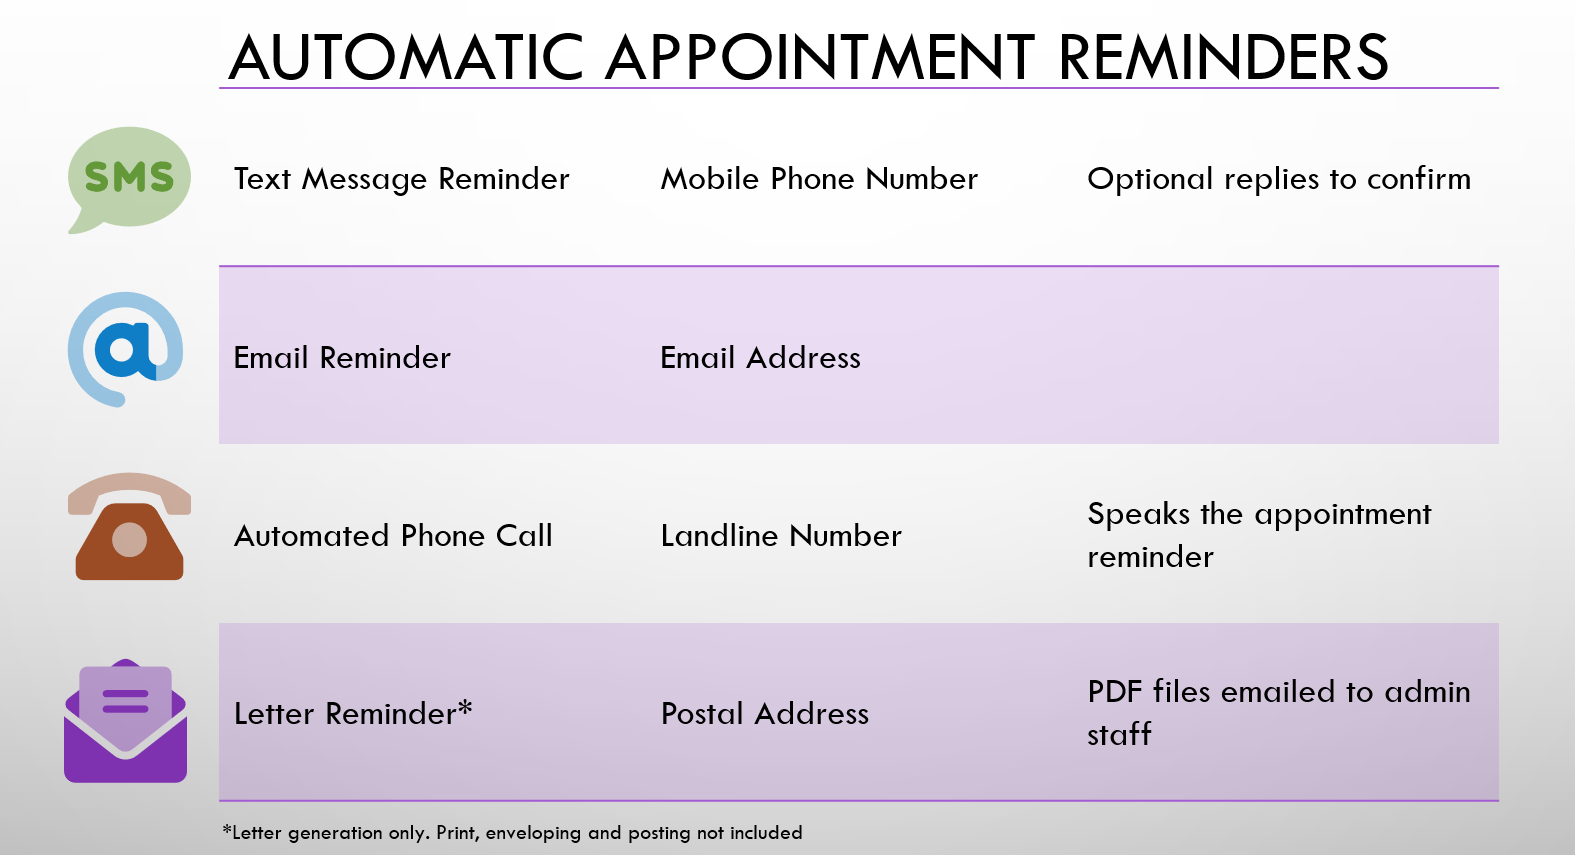
- Consult your account administrator to determine which reminder features will be used (e.g., SMS, email, voice calls, letters).
- Ensure you have the necessary client details (e.g., mobile number for SMS reminders).
Step 2: Add a New Client
- Click the green Plus icon in the top right.
- Select “Add New Client”.
- Enter the client’s first name, last name, and mobile number (minimum required for SMS reminders).
- Click “Save”.
Step 3: View and Edit Clients
- Click the “Clients” icon in the Area Menu.
- Use the search field to find a specific client.
- Click on a client’s row to view their record.
- Click the “Edit” button in the toolbar to update details.
Note: All fields are optional, but follow your administrator’s guidance on which fields to use.
Adding Appointments
Step 1: Create a New Appointment
- Click the green Plus icon in the top right.
- Select “Add New Appointment”.
Step 2: Fill in Appointment Details
- Client: Begin typing the client’s name to search and select.
- User: Select the Diarybook user the client is seeing.
- Appointment Type: Choose from the list (managed by the administrator).
- Date and Time: Specify the appointment date and time.
- Repeat: Use this field to add multiple appointments for the client.
- Duration: Pre-populated based on the appointment type.
- Rooms and Resources: Optional field to book rooms or equipment.
- Waiting Room: Advanced feature for capacity control, monitoring, and self-check-in.
- Remind Client Using: Select how and when the client will be reminded.
Note: Diarybook prevents double-booking but allows overrides for specific scenarios.
Step 3: Save the Appointment
- Click “Save” to finalize the appointment.
Viewing and Managing Appointments
Step 1: View Appointments
- Click the “Clock” icon to view appointments.
- Click on an appointment to open its details.
Step 2: Edit Appointments
- Use the “Edit” icon in the toolbar to modify appointment details.
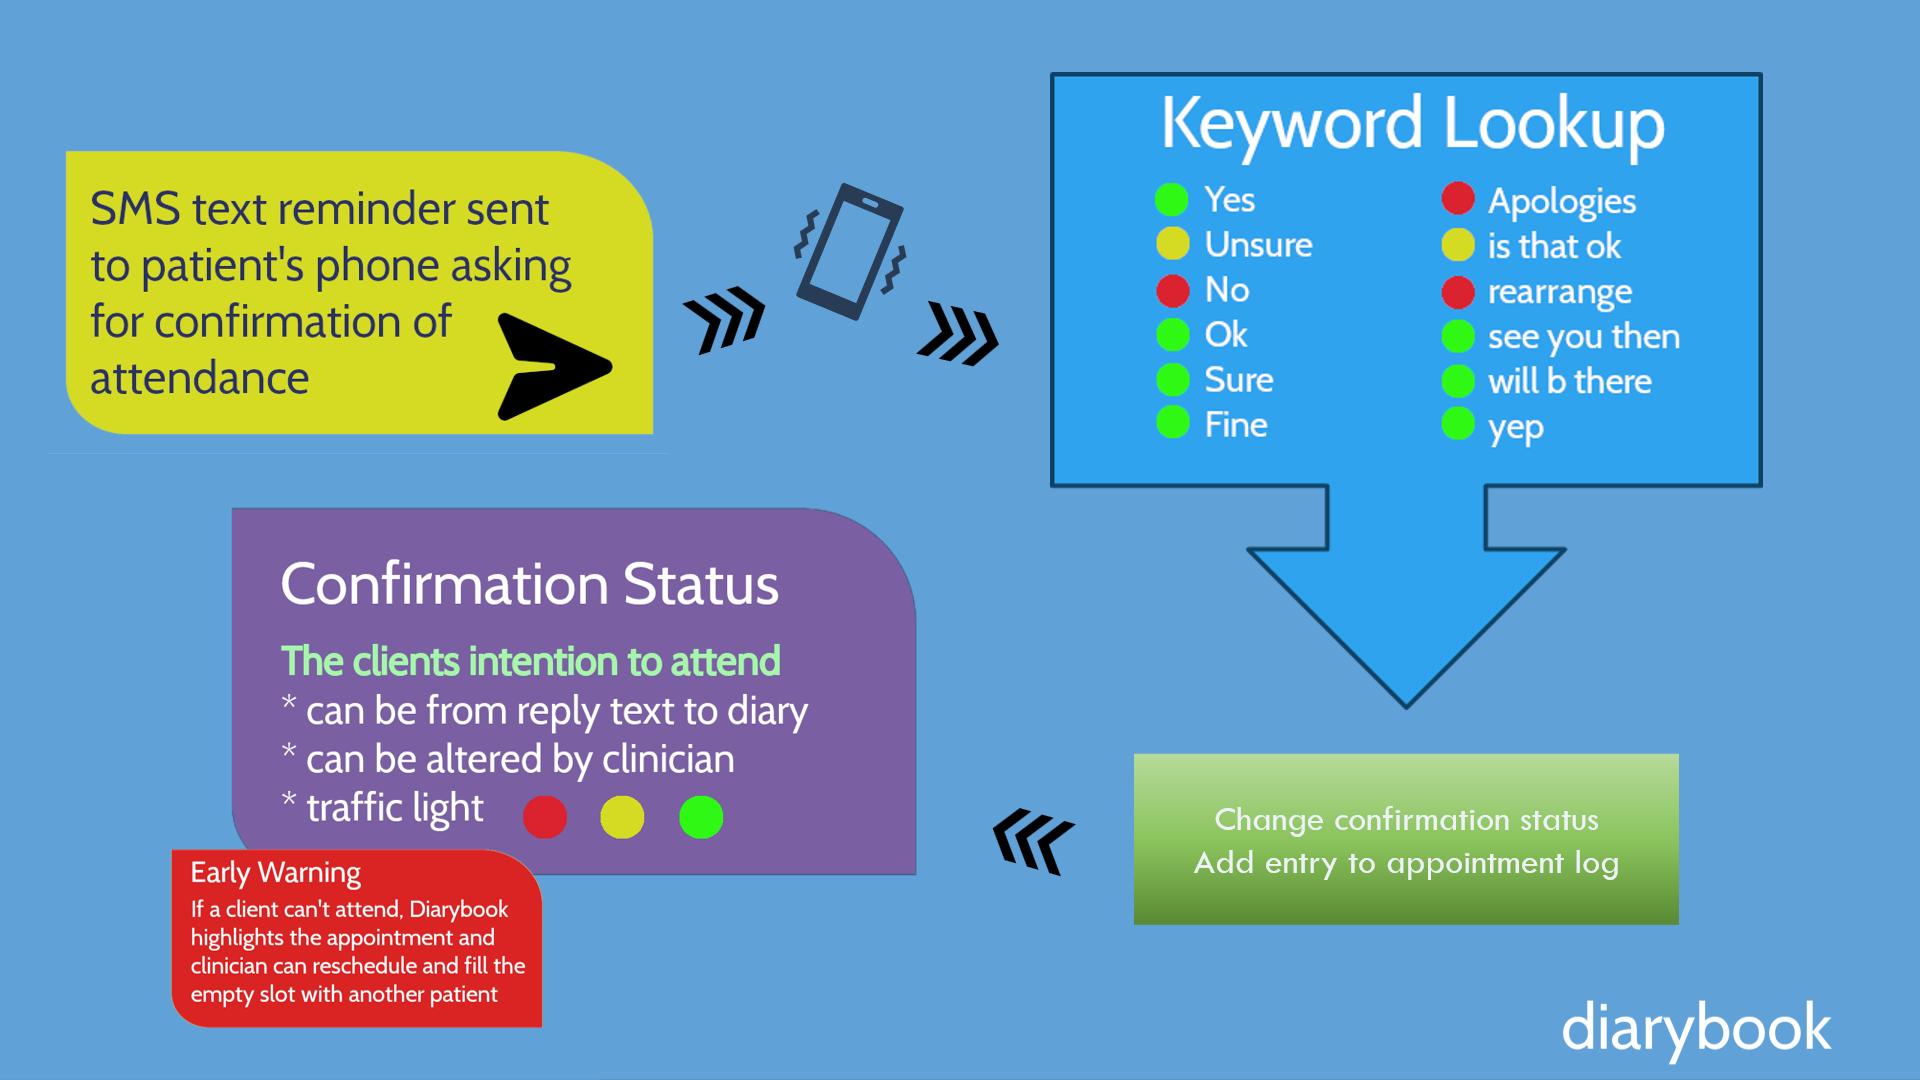
Step 3: View Confirmation Status
- Status Symbols:
- Green Arrow (↗): Reminder sent.
- Grey Arrow (↙): Reply received.
- Circle Icon: Confirmation status (Green: Confirmed, Red: Unable to attend, Yellow: Maybe, Grey: No status).
- Status Column: Shows the status in text on the far right.
Note: Diarybook automatically updates confirmation status based on client replies.
Cancelling Appointments and Sending Notifications
Step 1: Filter Appointments
- Use the “Filter” option in the toolbar.
- Select the user whose appointments you want to cancel.
- Click “Apply”.
Step 2: Select Appointments
- Click the tick box in the toolbar to select all filtered appointments.
Step 3: Send SMS Notifications
- Go to the “Appointments” menu.
- Select “Send SMS”.
- Choose the appropriate Sender ID.
- Type your message.
- Preview the messages and click “Send”.
Step 4: Cancel Appointments
- Go back to the “Appointments” menu.
- Select “Change Confirmation Status” > “Cancelled by User”.
Conclusion
This tutorial covered:
- Accessing Diarybook.
- Adding and editing clients and appointments.
- Manually sending messages and cancelling appointments.
On this page